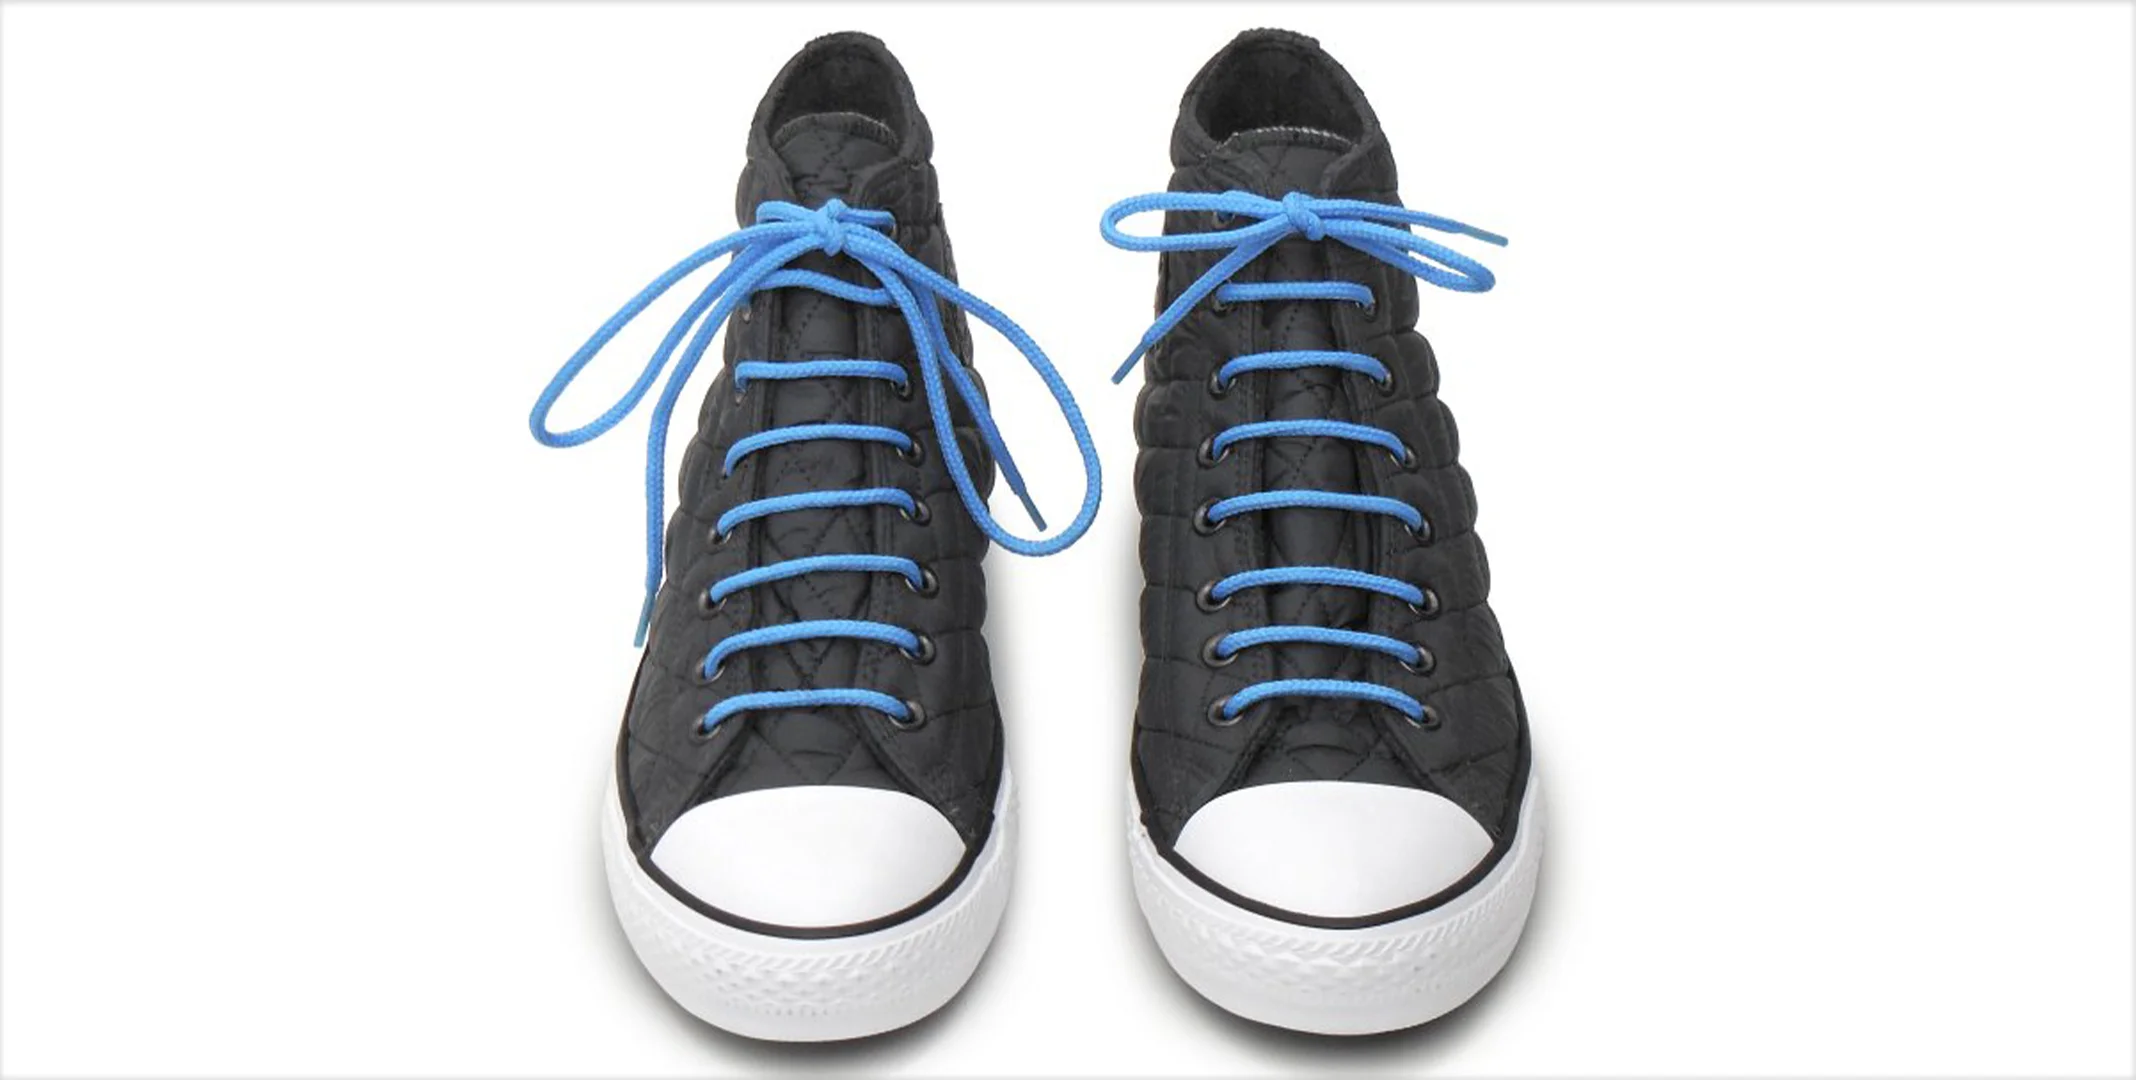
Straight bar lacing is a cool way to tie your shoes, especially if your shoelaces are really long. This way of lacing makes your shoes look neat, especially on fancy boots and shoes. The best part is you can still make them feel tighter or looser by adjusting it easily.
➻ Step 1:
Put the small plastic ends (aglets) of your shoelaces down through the small holes (eyelets). Make sure that the lengths of the two ends match.
➻ Step 2:
Take the right end and bring it up inside the shoe, heading towards the next small hole. Slide the plastic end through and move it upward. Cross it over to the hole on the opposite side and put the plastic end down into the shoe.
➻ Step 3:
Take the lace from the bottom left of the shoe and thread it inside towards the next hole. Pull the plastic tip through and up. Now, cross it over to the hole on the opposite side and push the tip down into the shoe.
➻ Step 4:
Keep doing this, going up inside, crossing over outside, and going down, switching between the left and right lace until you get to the top. This gives your shoes a nice and simple look with shorter laces.
➻ Step 5:
If the laces end up different lengths, just loosen all the crossed laces and adjust them until they’re the same.
Source / Pinterest
2: End Shortening Lacing
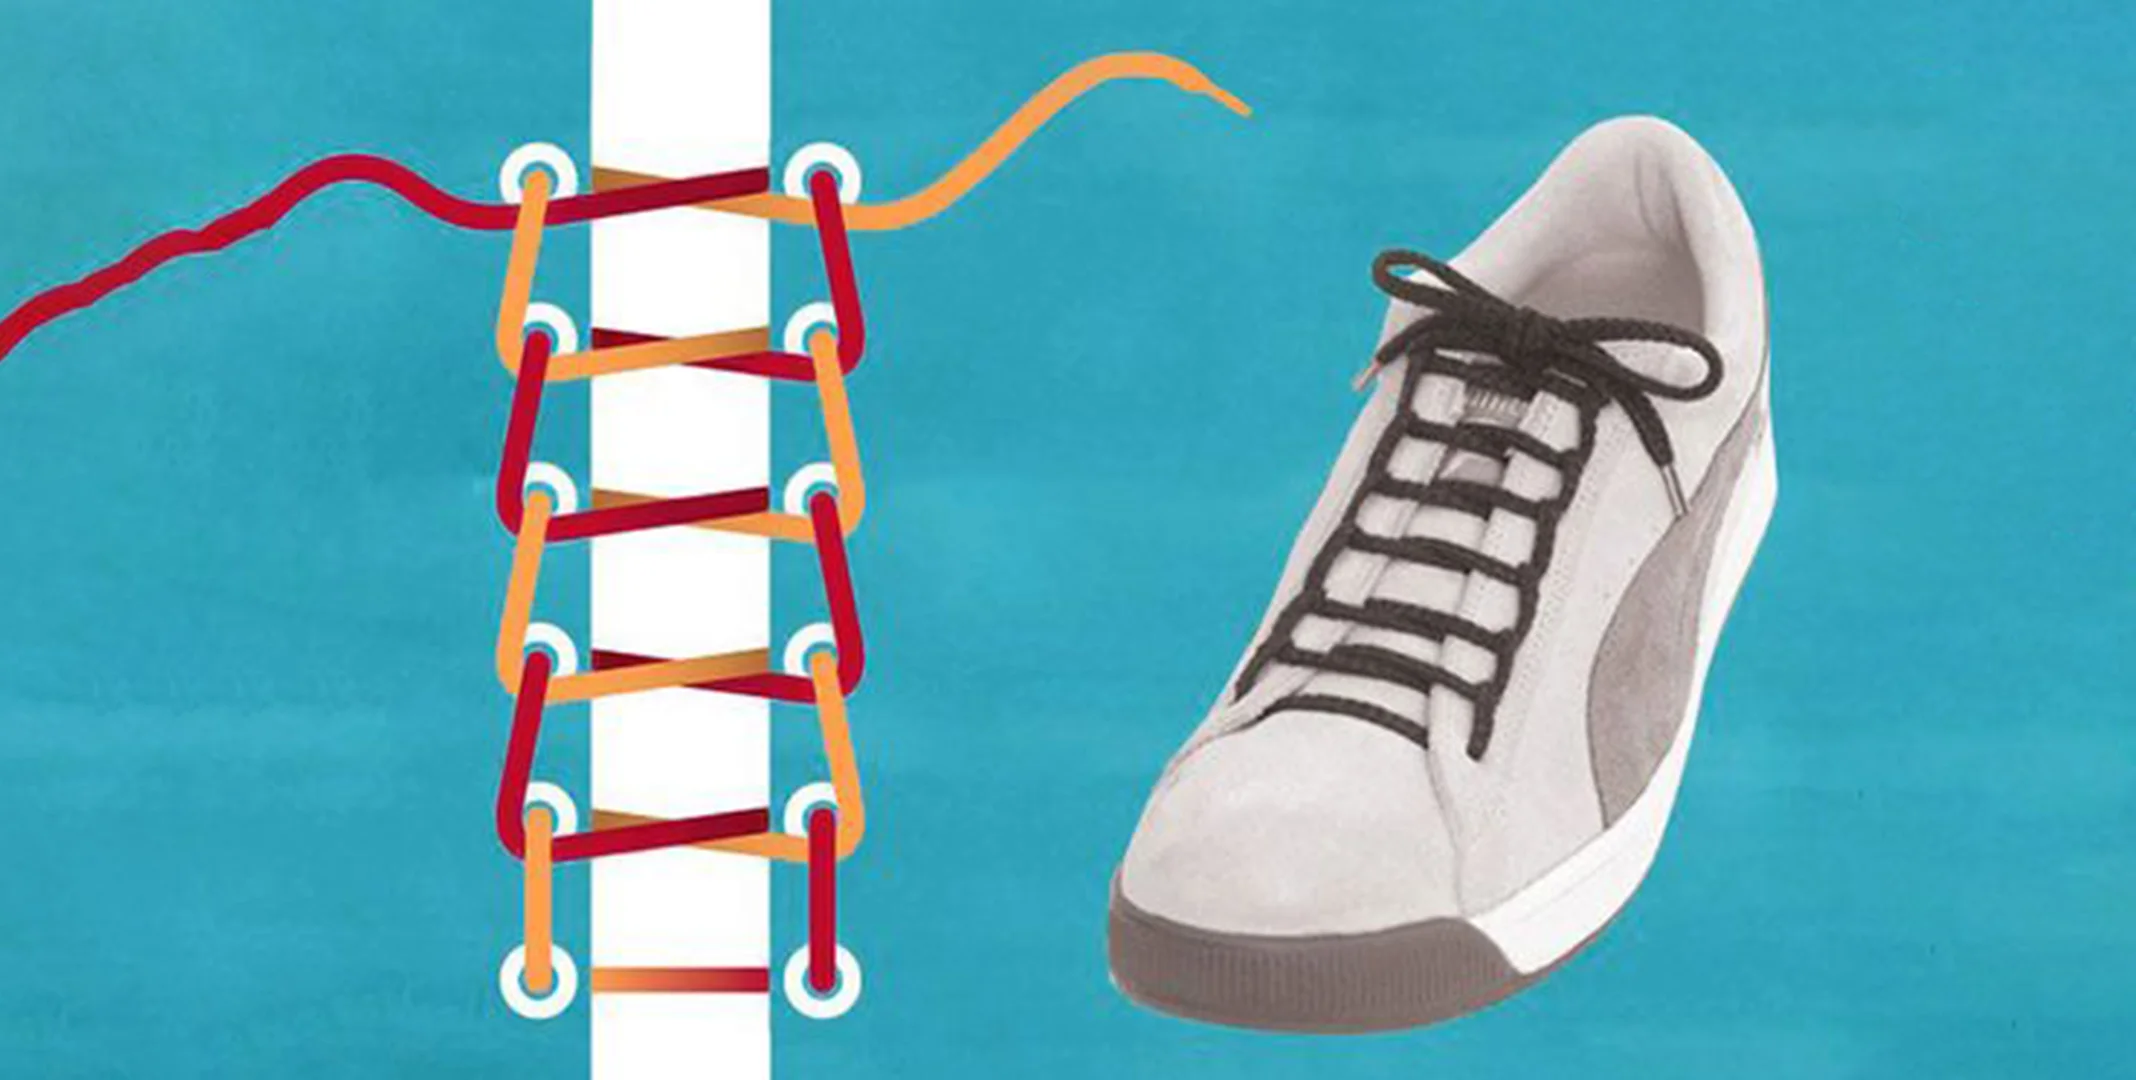
Shortened lacing is a bit fancier than regular lacing, and it does exactly what the name suggests – it makes long shoelaces shorter. Most of the work is done on just one side of the laces, so once you get the hang of it, it’s not too hard.
➻ Step 1:
Take the left lace and pull it up through the hole in the shoe from the inside, making it the length you want.
➻ Step 2:
Thread the lace through the bottom left hole, across, and down through the bottom right hole.
➻ Step 3:
Guide the lace along the inside of the shoe to the second-to-the-top hole on the right side. Then, thread it up, across to the left-side hole, and down into the shoe.
➻ Step 4:
Guide the lace along the inside of the shoe to the second-to-the-bottom hole on the left side. Then, thread it up, across to the right-side hole, and down into the shoe.
➻ Step 5:
Guide the lace along the inside of the shoe to the third-from-the-top hole on the right side. Then, thread it up, across to the left-side hole, and down into the shoe.
➻ Step 6:
Guide the lace through the third-from-the-bottom hole on the left side of the shoe, then pull it up, go across to the hole on the right side, and thread it down into the shoe.
➻ Step 7:
Guide the lace through the fourth-from-the-top hole on the right side, then pull it up, go across to the hole on the left side, and thread it down into the shoe.
➻ Step 8:
Guide the lace through the last remaining hole on the left side, then pull it up, go across to the hole on the right side, and thread it down into the shoe.
➻ Step 9:
Pull the lace up through the inside of the shoe towards the topmost hole on the right side to finish the lacing pattern.
Source / Pinterest
3: Ladder Lacing
Using ladder lacing is common for paratroopers and military boots because it creates a really tight and secure fit. This method is also great if you have long laces and want to make them shorter without cutting them.
➻ Step 1:
Start by putting the laces through the bottom eyelet, bringing both ends up from inside the shoe. Make sure the ends are the same length.
➻ Step 2:
Take the right lace up the outside of the shoe and down into the right eyelet. Don’t pull it tight yet.
➻ Step 3:
Do the same with the left lace, going up the outside and down into the left eyelet.
➻ Step 4:
Bring the right lace up and thread it under the left lace, just below where it goes into the eyelet. Repeat with the left lace under the right one. Now, pull both laces tight to secure the first knot.
➻ Step 5:
Keep repeating this pattern – up on the outside, down into the eyelet, and across the loop under the opposite lace before pulling tight – all the way up the shoe.
➻ Step 6:
If you still have extra length when you reach the last eyelet, do the cross-over-and-weave-under pattern again before tying your shoes. This will use up even more length!
Source / Pinterest
4: Boat-shoe Knot
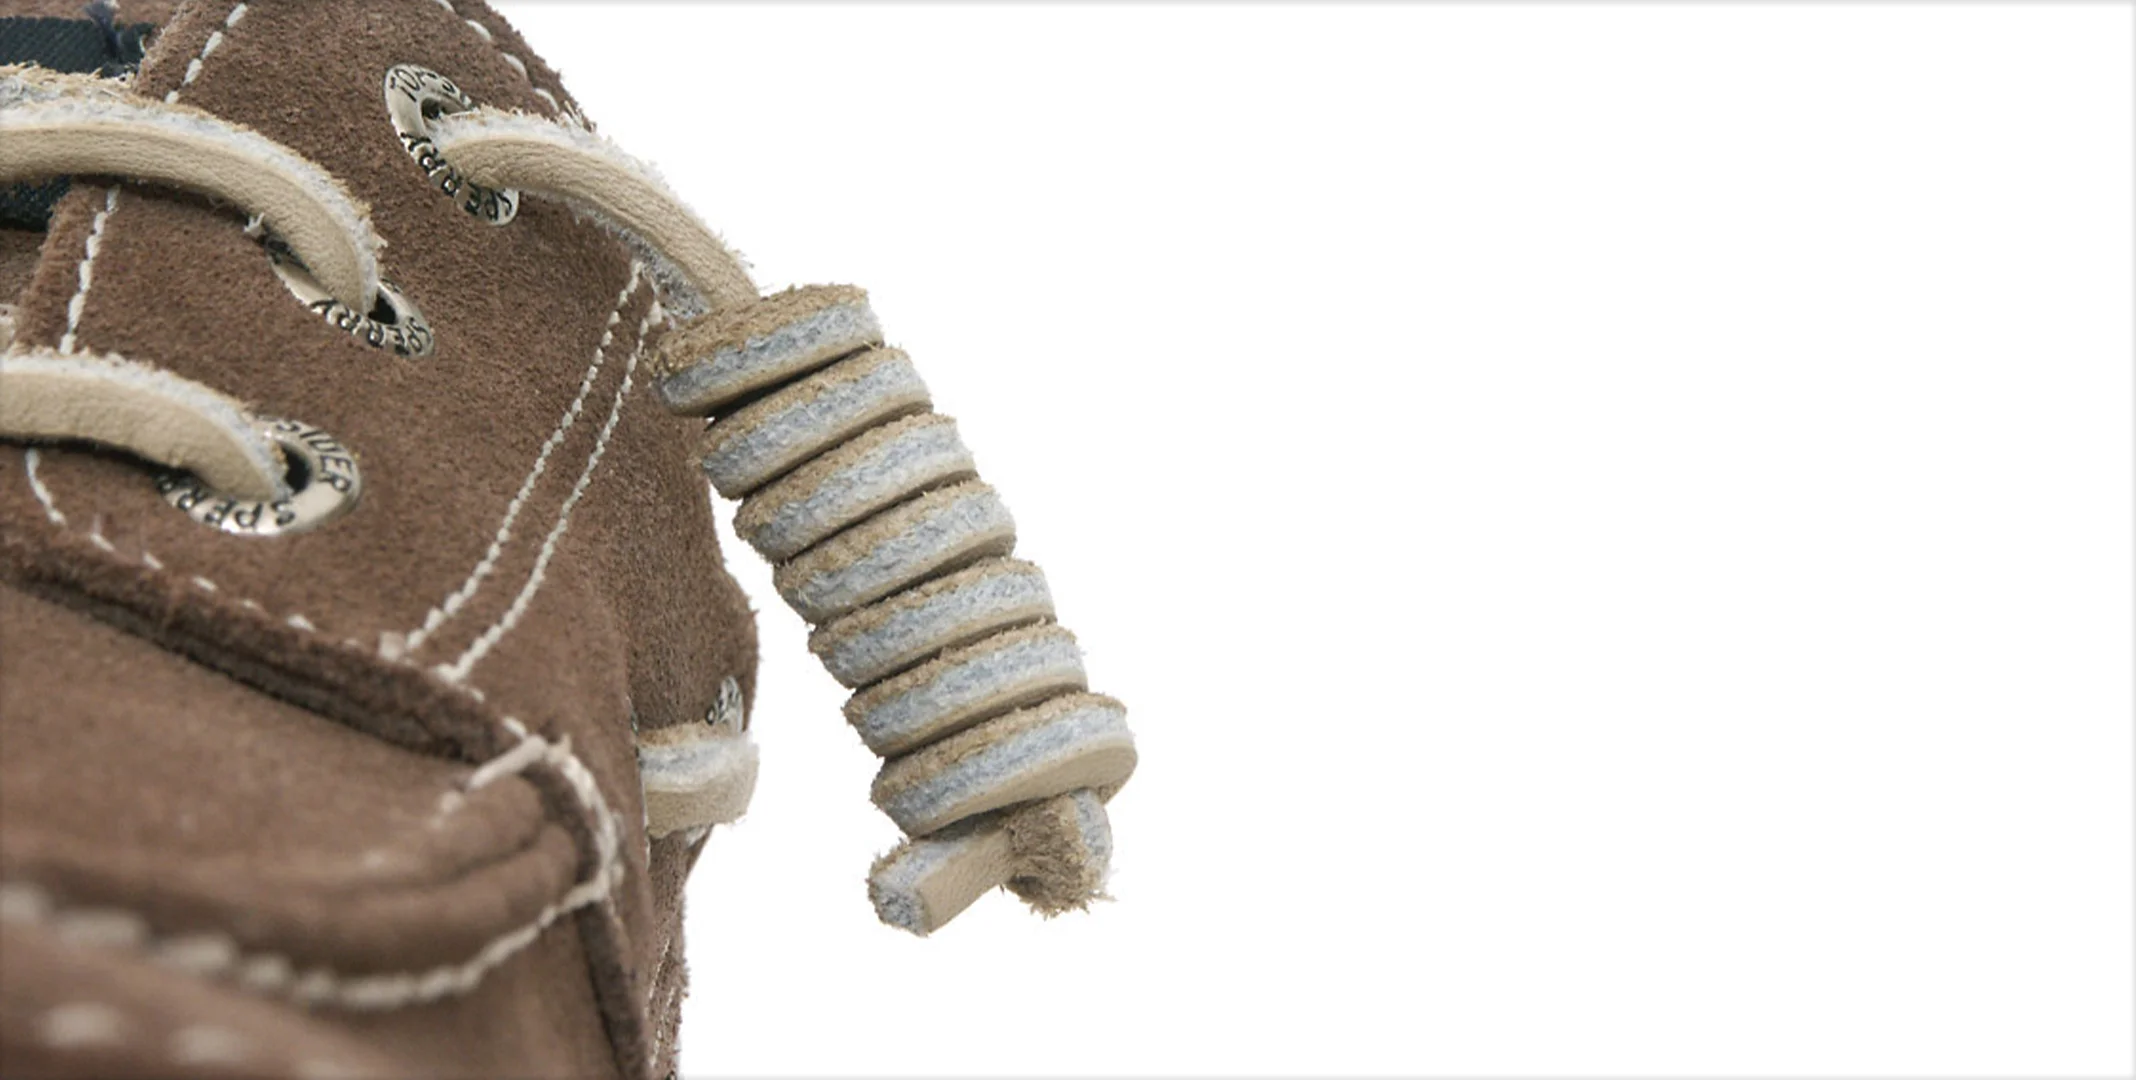
Instead of using a complicated lacing pattern, you can make a special boat-shoe knot with any extra shoelace length.
The boat-shoe knot is good for some shoes, like your favorite running shoes or casual sneakers. But don’t use it for fancy dress shoes, work boots, or formal footwear.
➻ Step 1:
Take the extra length of your right-side shoelace and make a loop at the end. Make the loop bigger if you want the knot to shorten your shoelace more, but it will hang closer to the ground.
Big loops are good for high-top or high-heeled shoes, while smaller loops work better for low-profile shoes.
➻ Step 2:
Wrap the lace around the loop, making each wrap close together and as tight as possible.
➻ Step 3:
Put the end of the shoelace into the top of the loop. Pull the base of the shoelace (going into your shoe) to tighten the loop around the aglet and secure the knot.
➻ Step 4:
Do the same on the left side, making sure the loop length and tightness of the wrap match. This way, both boat-shoe knots look similar.
Source / Pinterest
5: Double Knot
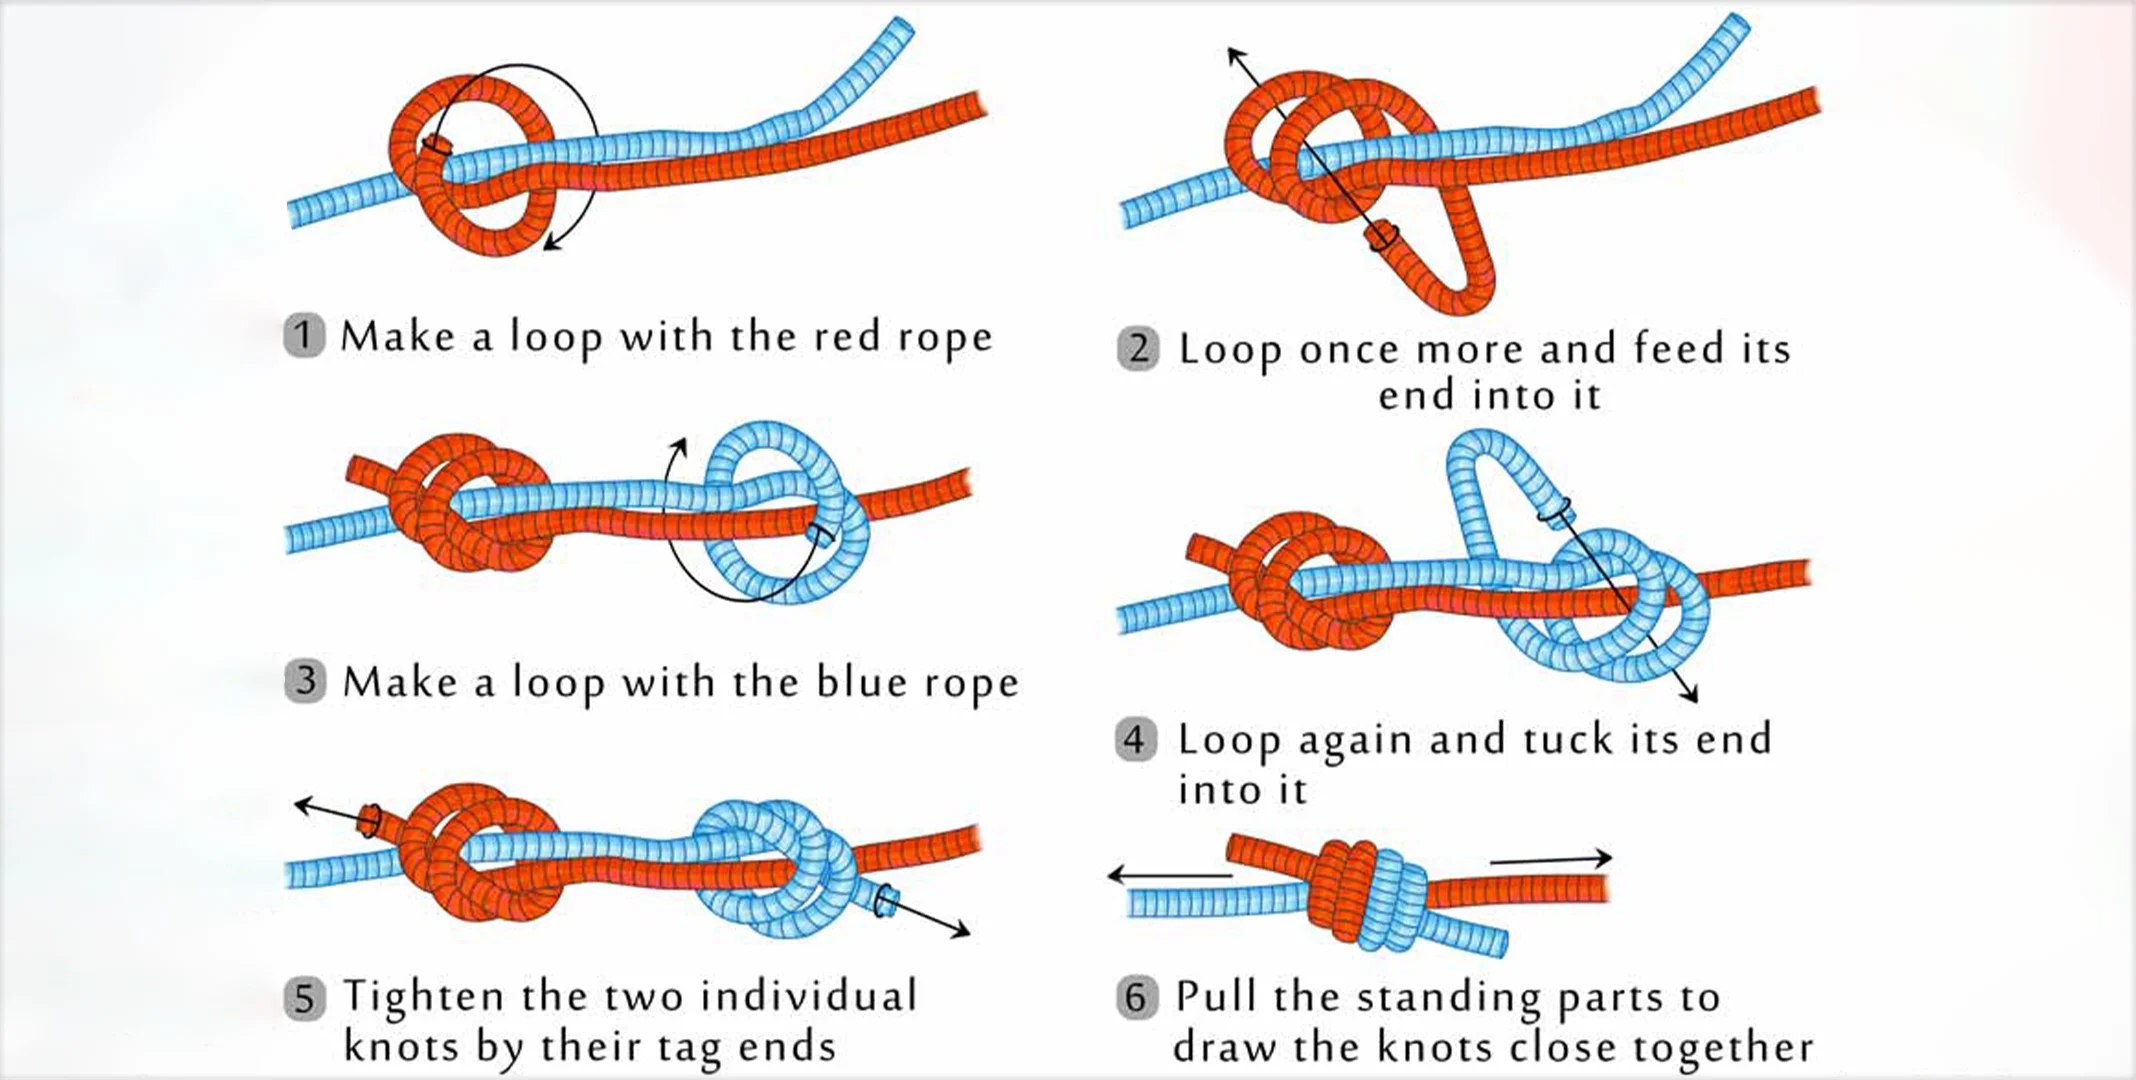
If you know how to tie your shoelaces with a regular bow, you can easily make it even shorter by doing a little trick. This works well when your laces are a bit too long but not long enough for special knots or fancy patterns.
➻ Step 1:
Tie your shoelaces with a regular bow. Now, you’ll have two loops and two loose ends with the small plastic tips.
➻ Step 2:
Hold both sets of ends in each hand, cross one over the other to make a loop, and push that end through the loop.
➻ Step 3:
Pull the knot tight, and you’re all set!
6: Wrap Around Your Ankles
For sports players, runners, or anyone who wants a quick fix for really long shoelaces, here’s a good option. But it only works if your laces are REALLY long—like, at least 6 inches extra on each side.
➻ Step 1:
Tie your shoes really well using your favorite knot.
➻ Step 2:
Take the extra length of the shoelace and wind it around your ankle over your sock.
Don’t wind it so tight that it squeezes your ankle too much or feels uncomfortable, but not so loose that it can come undone or rub against your skin and make blisters.
➻ Step 3:
Wind it around once and tie it at the back of your ankle if the shoelaces are just a bit too long. If they’re super long, wind them around your ankle as many times as needed to make them short enough to tie off.

Source / Pinterest
7: Tuck and Go
If you’re in a rush and don’t want to spend time making complicated knots or risking damage to your shoelaces, the “Tuck and Go” method is a simple solution.
It might not be the most comfy or secure choice, and it’s not great for fancy or formal shoes. But for slip-ons or sneakers you wear for a quick trip to the store or while unloading groceries, it’s a good way to keep those extra-long laces from getting in your way and prevent slipping or tripping.
➻ Step 1:
Tie your shoelaces in your preferred knot. Or, if you’re in a hurry, you can skip tying and go straight to the tucking step.
➻ Step 2:
Tuck the extra length into your shoes, either behind or beneath the tongue (which might be a bit uncomfortable on the top of your foot) or beside your ankles. Whether your shoes are tied or not, the laces should stay securely in place as you walk.
Conclusion
Your shoe strings are really important for your shoes. They make sure your shoes stay on your feet when you’re running, jumping, and playing.
If your shoe strings are the right size, you won’t even think about them once you tie them. But if they’re too long or too short, they can cause problems and make accidents more likely.
I hope the tips I gave can help you make your shoe strings just the right size—either by cutting them or using special ways to tie them so you don’t have to think about them again.
FAQS
Q1: What if your shoelaces are too long?
If your shoelaces are too long, one option is to cut them. But, before you do something that might harm the laces, think about trying a special way of lacing or tying knots. This can use up the extra length without needing to cut them.
Q2: Can you trim shoelaces to make them shorter?
Yes, you can trim shoelaces to make them shorter. Just remember that you may need to replace the plastic or metal covering at the ends (called aglets) to prevent the laces from getting damaged and worn out.”
Q3: How do you tie shoelaces to make them short?
You can use a fancier way of lacing (like ladder, straight bar, or shortening at the end, as I explained before) or a knot that uses up the extra length (such as the double knot or boat-shoe knot).


